
FTP Server setup in Azure File server for copying files from on premise to Azure VM.
Below are the setup file.
Reference links
http://www.iis.net/learn/publish/using-the-ftp-service/configuring-ftp-firewall-settings-in-iis-7
http://itq.nl/walkthrough-hosting-ftp-on-iis-7-5-a-windows-azure-vm-2/
Other method of copying files
http://www.online-tech-tips.com/software-reviews/tools-for-copying-many-files/
Installing FTP service on a Windows Azure VM
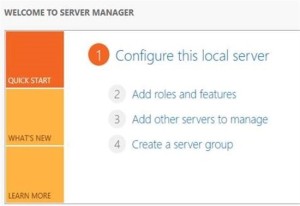
- Open Server Manger and click Add roles and features.
- From Installation Type tab select Role based or feature-based installation and click Next. 3. From Server Selection tab select the server on which you want to enable FTP and click Next. 4. From Server Roles tab select Web Server (IIS), you will be presented with the Add Roles and Features Wizard.Click Web Server (IIS) and then click Add Features.

- Click Next on the Features and Web Server Role (IIS) tabs.
- From Role Services tab select FTP Server and FTP Service and click Next.

- From Confirmation tab click Install and wait for the installation to complete.
Adding the FTP site to IIS Manager
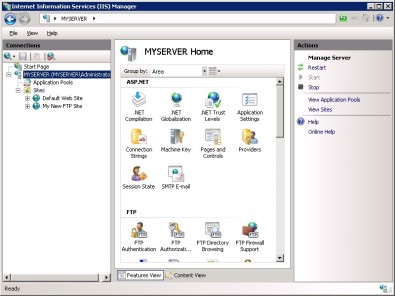
- From the Control Panel> Administrative Tools open the IIS Manager.
- From IIS Manager, in the Connections pane, expand the Sites node in the tree, then right click the Default Web Site.
- Now click Add FTP Publishing.
- Fill the Add FTP Site dialog box as shown in the below figures and click Finish.
When you’re in, you need to configure IIS. A summary of the required steps:

Specify the name and the local path for the site:

Specify binding and SSL information:
If you do not want SSL you can select NO SSL.

And finally specify who should have access to the FTP site. Note that I selected Basic Authentication and the all users..When you do not use SSL to secure access to the FTP site, your FTP credentials are sent in cleartext when logging in to the FTP site.
If you do not want Anonymous authentication you can uncheck the anonymous authentication.

Configure the Passive Port Range for the FTP Service
In this section, you configure the server-level port range for passive connections to the FTP service. Use the following steps:
- Go to IIS 7 Manager. In the Connections pane, click the server-level node in the tree.
2. Double-click the FTP Firewall Support icon in the list of features.

- Enter a range of values for the Data Channel Port Range.

- Once you have entered the port range for your FTP service, click Apply in the Actions pane to save your configuration settings.
Notes:
- The valid range for ports is 1024 through 65535. (Ports from 1 through 1023 are reserved for use by system services.)
- You can enter a special port range of “0-0” to configure the FTP server to use the Windows TCP/IP dynamic port range.
- This port range will need to be added to the allowed settings for your firewall server.
Step 2: Configure the external IPv4 Address for a Specific FTP Site
In this section, you configure the external IPv4 address for the specific FTP site that you created earlier. Use the following steps:
- Go to IIS 7 Manager. In the Connections pane, click the FTP site that you created earlier in the tree,

- Enter the IPv4 address of the external-facing address of your firewall server for the External IP Address of Firewall setting.
 .
.
- Once you have entered the external IPv4 address for your firewall server, click Apply in the Actions pane to save your configuration settings.
Summary
To recap the items that you completed in this step:
- You configured the passive port range for your FTP service.
- You configured the external IPv4 address for a specific FTP site.
- Click Apply. You will be prompted to configure the firewall to allow FTP access.

- To make sure that FTP server has taken all the setting we added, let’s stop and start the FTP service.
Note: iisreset does not restart the FTP service as it is outside the IIS.

Configure Windows Firewall Settings
Windows Server 2008 contains a built-in firewall service to help secure your server from network threats. If you choose to use the built-in Windows Firewall, you will need to configure your settings so that FTP traffic can pass through the firewall.
There are a few different configurations to consider when using the FTP service with the Windows Firewall – whether you will use active or passive FTP connections, and whether you will use unencrypted FTP or use FTP over SSL (FTPS). Each of these configurations are described below.
Note: You will need to make sure that you follow the steps in this section walkthrough while logged in as an administrator. This can be accomplished by one of the following methods:
- Logging in to your server using the actual account named “Administrator”.
- Logging on using an account with administrator privileges and opening a command-prompt by right-clicking the Command Prompt menu item that is located in the Accessories menu for Windows programs and selecting “Run as administrator”.
Note: While Windows Firewall can be configured using the Windows Firewall applet in the Windows Control Panel, that utility does not have the required features to enable all of the features for FTP. The Windows Firewall with Advanced Security utility that is located under Administrative Tools in the Windows Control Panel has all of the required features to enable the FTP features, but in the interests of simplicity this walkthrough will describe how to use the command-line Netsh.exe utility to configure the Windows Firewall.
Using Windows Firewall with non-secure FTP traffic
To configure Windows Firewall to allow non-secure FTP traffic, use the following steps:
- Open a command prompt: click Start, then All Programs, then Accessories, then Command Prompt.
- To open port 21 on the firewall, type the following syntax then hit enter:
netsh advfirewall firewall add rule name=”FTP (non-SSL)” action=allow protocol=TCP dir=in localport=21
- To enable stateful FTP filtering that will dynamically open ports for data connections, type the following syntax then hit enter:
netsh advfirewall set global StatefulFtp enable
Adding ports specified in the previous step as endpoint to the VM
Ports 1035 to 1040 should also be added as endpoint to the Azure VM. You can add multiple ports as endpoint to the VM using Windows Azure PowerShell. Detailed procedure here.
You can also add endpoints using the management portal. Detailed procedure here.
To confirm that the said ports are added to the VM, please check the endpoint list on portal for the said VM.
Note: You also would need add port 21 to the endpoint list which is command port for FTP connection.

Adding Firewall rules to allow traffic on the added endpoint
For ports added as endpoints in the above procedure, no configuration is done automatically to the firewall in the guest operating system. When you create an endpoint, you’ll need to configure the appropriate ports in the firewall to allow the traffic you intend to route through the endpoint.
In this case I have disabled the Windows firewall for simplicity. You can refer here to modify the firewall rules to allow traffic on the ports added as end points.
We are now done setting up the passive FTP Server on a Windows Azure VM.
Verifying that FTP server is using the port previously specified under data channel port
- Client connects on the command port, which is usually TCP port 21.
- When the connection on command port is successful, the server sends a port to the client to connect to. If you are using FileZilla, you will see something like this: Command: PASV Response: 227 Entering Passive Mode (168,63,240,169,4,14). Where 168,63,240,169 is the IP address of the VM and 4,14 is the port on which the data traffic is routed (256*4+14=1038). This is how you determine that a port added in previous steps are actually being used to establish a passive FTP connection.
Points to consider from Azure SLB perspective
When FTP is transferring large files, the elapsed time for transfer may exceed 4 minutes, especially if the VM size is A0. Any time the file transfer exceeds 4 minutes, the Azure SLB will time out the idle TCP/21 connection, which causes issues with cleanly finishing up the FTP transfer once all the data has been transferred.
Basically, FTP uses TCP/21 to set everything up and begin the transfer of data. The transfer of data happens on another port. The TCP/21 connection goes idle for the duration of the transfer on the other port. When the transfer is complete, FTP tries to send data on the TCP/21 connection to finish up the transfer, but the SLB sends a TCP reset instead.
The way around this is to make the client to keep the TCP/21 connection from going idle. If using a 3rd party FTP client, there may be configuration knobs the user can turn in order to cause the FTP client to send a keepAlive. As an example of how you can set this in FTP client software, in FileZilla, you go to Edit, Settings, Connection, FTP, and check Send FTP keep-alive commands.

If the FTP client is being written in .NET, customers will need to account for this client-side keepAlive in their code. Here is a sample (the keepAlive is highlighted):
